|
|
STEP BY STEP FOR OPERATION
1、Prepare
electrolyte:
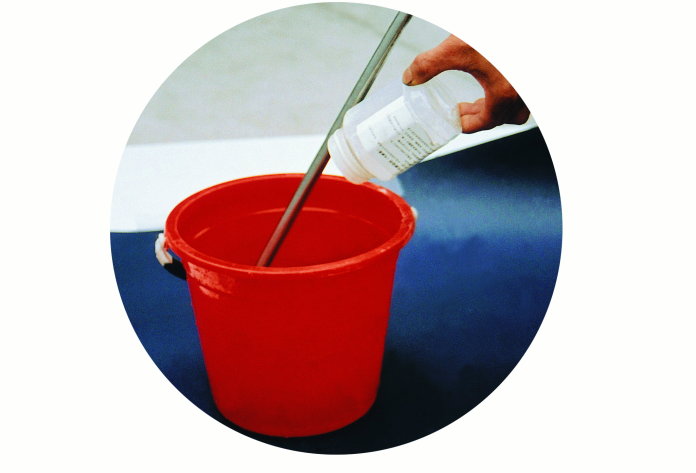
Pour 2500cc distilled water (or pure
water) into a container made of glass, china
or heat-resistant plastic
(warning: aluminium container is prohibitted). Put 1
bottle of electrolyte powder into the water
slowly, stir until it is dissolved
completely. It generates heat while
dissolving, and need to be cooled for about
20 minutes. |
|
 |
| 2、Add
electrolyte:
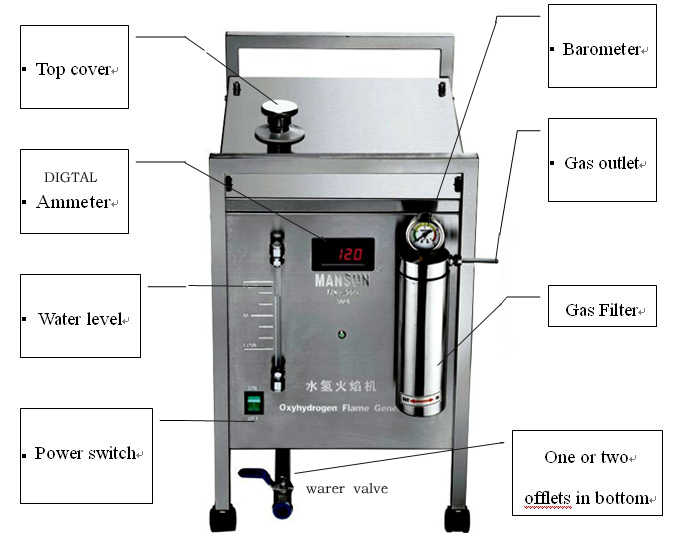
Screw off the top cover, add electrolyte
into the generator carefully until the water
level close to the “high” line, then screw
on the cover. The best water level is
between “middle” and “high” lines. |
|
 |
|
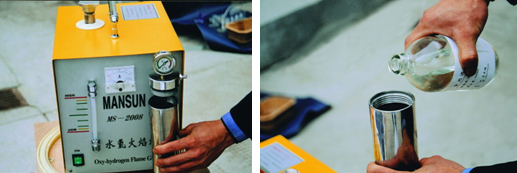
3、Prepare the gas filter:
Screw off the gas filter, add 100cc pure
water or ethanol, then screw it on.
Ethanol(alcohol) is for fire-polishing acryl
(organic glass), because the mixture of
hydrogen and ethanol volatile can lower the
flame temperature. The remaining ethanol
should be poured out of the gas filter
everyday after use. |
|
 |
| |
|
4、Switch on and check:
Switch on the power, the indicator light
turns bright, the fan begins running and the
ammeter indicates around 55A(300-350W),
120A(600W) or 160A(1000W); gas can be felt
out of the outlet (within 1 minute), the
barometer indicates 0.01-0.05mpa. If you
seal it with a finger, the gas pressure will
go up until over 0.1mpa and the ammeter
indicates zero; move out the finger, the gas
pressure will go down and the ammeter
indicates well.
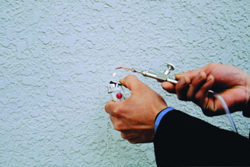
5、Link the
rubber pipe and torch and ignite:
Link the rubber pipe and torch to the gas
outlet. Hold the torch and open the valve on
the torch, then ignite and observe the color
of flame. The normal color is light blue.
The valve can be adjusted to control the
flame. To change a torch, you should turn
off the valve to extinguish first.
For fire-polishing acryl, choose a suitable
torch, let the flame 45 degree to the coarse
surface of acryl and move it parallel.
Anyone can use it adroitly after several
hours of practice.
|
|
 |
| |
| 6、Add
water timely:
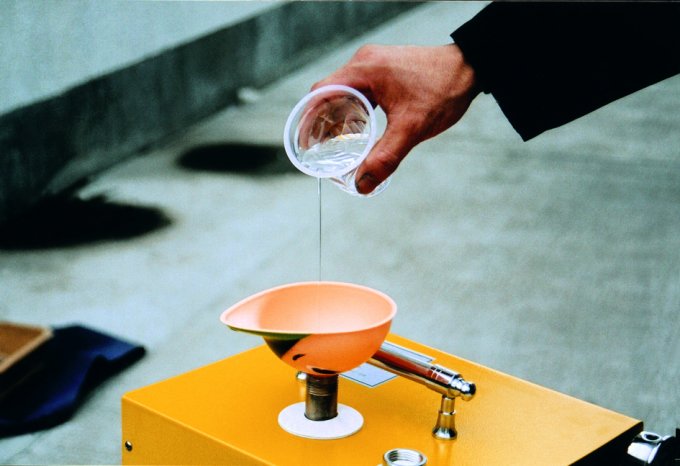
After several hours of operation, the
water level may fall below the “middle”
line, and the “fuel”—water should be added.
Distilled water is the best choice, then is
purified water, cold boiled water, tap water
and mineral water, orderly.
How to add water:
- Turn off the torch
- Switch off the power and
open the valve on the torch to
let out the remaining gas
- Screw off the top cover
- Add water close to the
“high” line
- Screw on the cover and
switch on, and it can work again
|
|
 |
| |
MAINTENANCE & WARNING
1)
The
electrolyte is alkaline and may hurt skin and eyes.
Avoid direct contact while preparing electrolyte;
let out the remaining gas before adding water to
avoid the electrolyte spurting out.
If stained on
skin or in eye carelessly, wash with lots of water.
2)
After the
first time of use, only water—the “fuel” need to be
added timely. Don’t add electrolyte.
3)
Theoretically, the electrolyte can be used
permanently. However after about 3 months of
operation it will become dirty or over-mixed with
ethanol, and should be changed because of losing
efficacy. To change electrolyte, open the outlet in
the bottom of the generator and drain off the dirty
electrolyte, wash the electrolyte case with pure
water, then screw on the outlet. Prepare and add new
electrolyte. This is to keep the electrolyte case
clean, thus avoiding the erosion of electrodes.
4)
The water
level should not exceed the “high” line, or the
liquid in gas filter may overflow, if so, pour out
the excessive electrolyte. The best water level is
between “middle” and “high” lines.
5)
Water in
rubber pipe may cause the flame turn red or yellow.
If so, take off the torch and check the gas filter
to drain the water out of the pipe.
6)
Avoid gas
leak at the connecting parts. Change the rubber pipe
in time if it is aged.
7)
The
controlling electrocircuit of the generator is
designed specially. Do not disassemble it.
8)
Do not
let the flame towards human or combustible.
9)
Cold
boiled water or tap water can be used as substitute
of distilled water, but mineral water is not
suitable.
10)
If
backfire occurs (even with exploding), do not panic.
Destructive test proves the protective design can
assure the safety of the operator. Backfire may be
caused by improper operation, gas leak, torch
malfunction or higher pressure. Check the pipe, add
backfire-proof fitting or change a torch may solve
the problem. Before that, it’s better to contact the
manufacturer for technical consultation.
11)
If any
other problems occur, visit out website (http://www.mansun.com.cn)
or dial 86-574-88040068 fax(86-574-88040078) for
technical consultation.
WARNING: OPERATE AND MAINTAIN THE MACHINE ACCORDING
TO THE USER’S MANUAL
COMMON PROBLEMS & WAYS TO SOLVE
|
Problem |
Reason |
Check and solve |
|
Red / yellow flame
Flame becomes wide & weak |
1.
Impurities or water in torch
2.
Water in rubber pipe
3.
Ethanol over-mixed in electrolyte |
1.
Clean up the torch and burn for a
while
2.
Blow out the water in the pipe
and check the gas filter
3.
Change electrolyte |
|
Weak flame, barometer indicates 0.10mpa,
ammeter indicates well |
Gas clogged |
1.
Check the rubber pipe
2.
Check the gas filter, adjust the
spring valve if necessary
3.
Check the backfire fitting and
torch |
|
Weak flame, barometer indicates low,
ammeter indicates well |
1.
Gas leak
2.
Electrolyte losing efficacy |
1.
Check the gas route
2.
Change electrolyte |
|
Barometer and ammeter indicate zero |
1.
Not electrified or fuse blowout
2.
Pressure switch malfunction
3.
If the indicate light bright, the
electrolyte may lose efficacy
4.
Power box malfunction |
1.
Check the wire and fuse
2.
Open the shelf to check
3.
Change electrolyte
4.
Let the pressure control wire
short circuit and check the power box,
or contact the manufacturer |
|
With pressure but no current
|
1.
Gas exists in the machine
2.
Ammeter malfunction |
1.
Check the machine
2.
Check the circuit, change ammeter
if necessary |
|
Pressure higher than 0.2mpa, rubber pipe
may be blown off |
1.
Pressure switch malfunction
2.
Safety valve malfunction |
Contact the manufacturer if cannot solve |
|
Backfire and explode inside |
1.
Backfire-proof fitting
malfunction
2.
Nozzle too big |
Change torch or add backfire-proof
fitting.
Contact the manufacturer if cannot solve |
|
Acryl turns yellowish or bubbled after
fire-polishing |
1.
Flame temperature doesn’t match
the material
2.
Material quality problem |
1.
Add ethanol into gas filter (see user’s
manual)
2.
Control the speed of fire-polishing well
3.
Change material |
Note: 1
year of maintenance, any problem can be solved in 10
years

CE |